Photoshop打造2011兔年艺术字特效
软件云 人气:1
最终效果图


制作步骤如下:
1、首先运行PHOTOSHOP软件,新建一文档——大小自定义——72像素分辨率——背景白色。
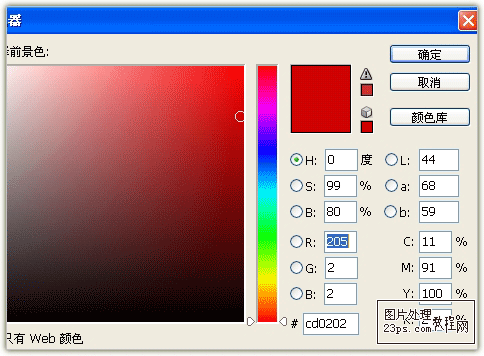
2、使用油漆桶工具,填充背景为#cd0202,如图:
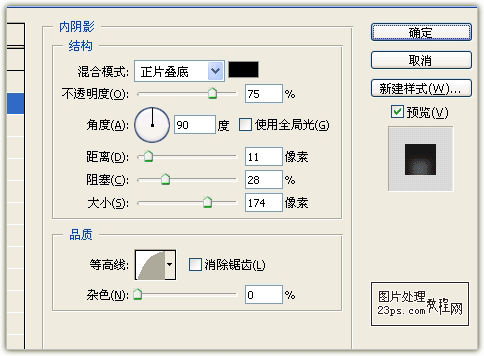
3、为背景层添加图层样式—内阴影/距离11像素/阻塞28%/大小174像素,如图:
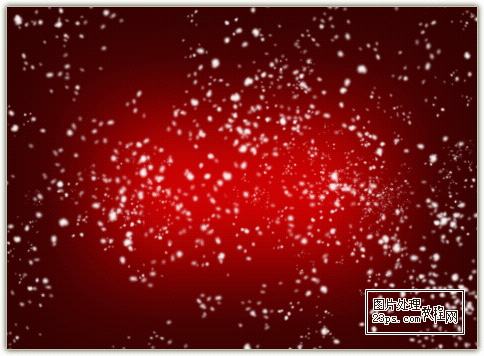
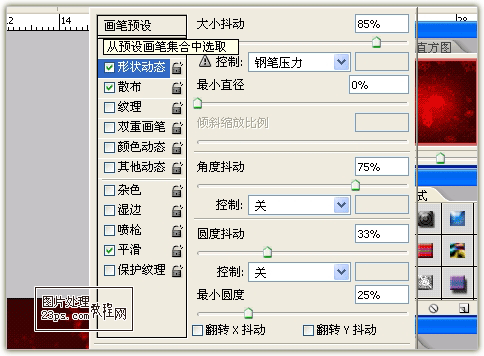
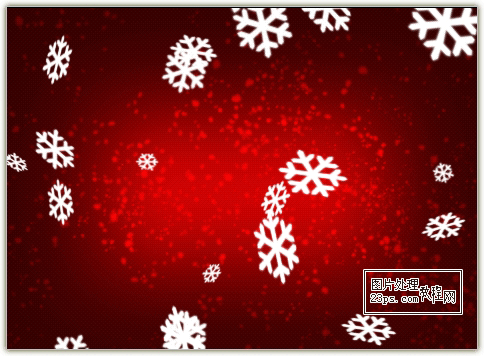
4、新建一图层,使用画笔工具~选择雪花笔刷(任意),在该层画出漫天飘雪的气氛,并将图层混合模式改成叠加,效果如图:
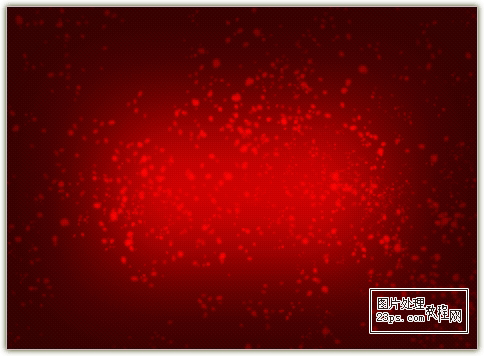
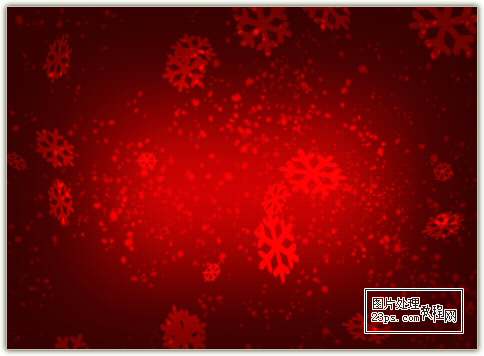
6、使用白色刷出雪花,做适当调整,并将图层混合模式改为叠加,效果如图:
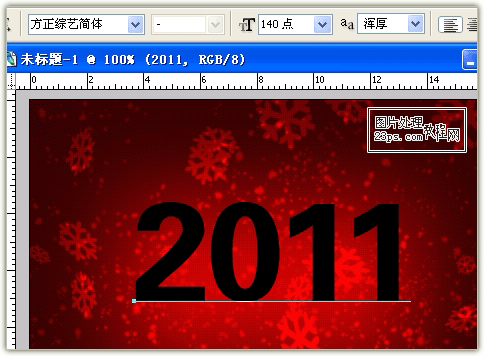
7、使用文字工具,选择“方正综艺简体”字体,输入“2011”,黑色,如图:
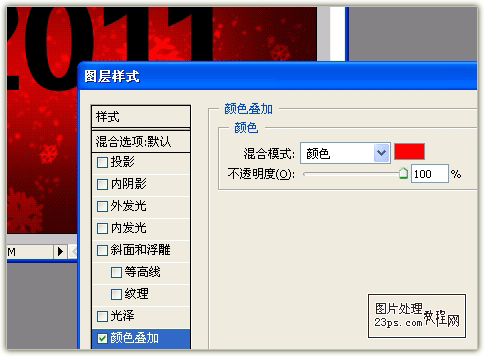
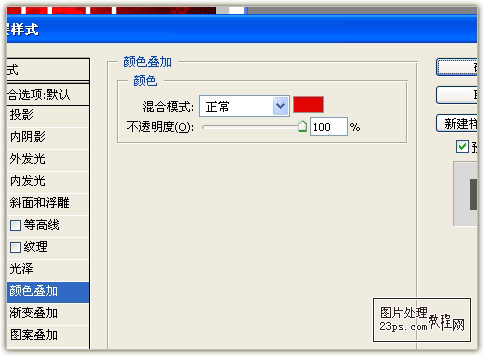
8、为文字层添加图层样式~颜色叠加~颜色为红色~不透明度100%,如图:
10、此时的效果如图:

11、新建一层,载入文字选区,为其扩展5—8像素,填充颜色白色,再载入文字选区,在此层按DELETE,使用笔刷在“0”的上面刷两只耳朵,如图

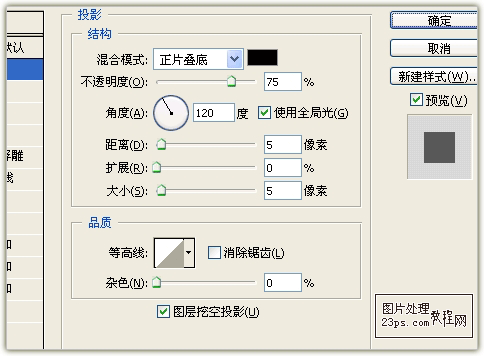
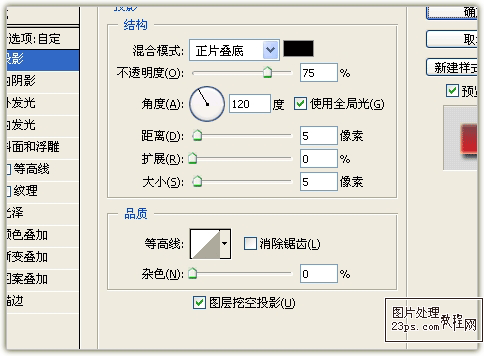
12、为该层添加图层样式~投影,设置如图:
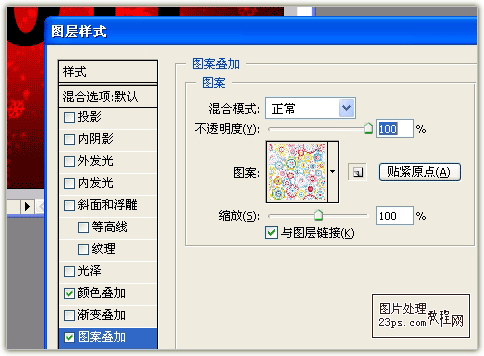
14、最后添加图层样式~颜色叠加~颜色为红色,如图
15、使用文字工具,输入“Happy New Year !”,字体“Amerika Sans”,并为大写字母分别设置不同颜色,设置如图:
16、为该层添加图层样式~投影,设置如图:
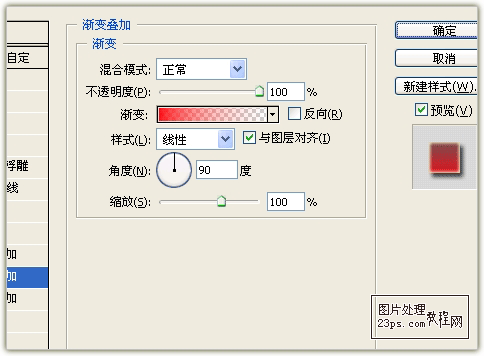
18、最后为该层添加图层样式~渐变叠加,样式为线形,设置如图:
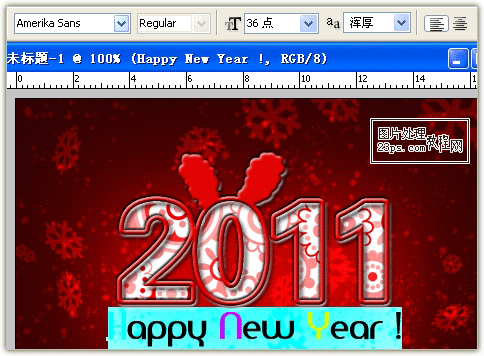
19、最后进行微调,得到最终效果,如图:

20、再添加一调整层~渐变映射,如下图,便又得到了不同的效果:
制作步骤如下:
1、首先运行PHOTOSHOP软件,新建一文档——大小自定义——72像素分辨率——背景白色。
2、使用油漆桶工具,填充背景为#cd0202,如图:
3、为背景层添加图层样式—内阴影/距离11像素/阻塞28%/大小174像素,如图:
4、新建一图层,使用画笔工具~选择雪花笔刷(任意),在该层画出漫天飘雪的气氛,并将图层混合模式改成叠加,效果如图:
6、使用白色刷出雪花,做适当调整,并将图层混合模式改为叠加,效果如图:
7、使用文字工具,选择“方正综艺简体”字体,输入“2011”,黑色,如图:
8、为文字层添加图层样式~颜色叠加~颜色为红色~不透明度100%,如图:
10、此时的效果如图:
11、新建一层,载入文字选区,为其扩展5—8像素,填充颜色白色,再载入文字选区,在此层按DELETE,使用笔刷在“0”的上面刷两只耳朵,如图
12、为该层添加图层样式~投影,设置如图:
14、最后添加图层样式~颜色叠加~颜色为红色,如图
15、使用文字工具,输入“Happy New Year !”,字体“Amerika Sans”,并为大写字母分别设置不同颜色,设置如图:
16、为该层添加图层样式~投影,设置如图:
18、最后为该层添加图层样式~渐变叠加,样式为线形,设置如图:
19、最后进行微调,得到最终效果,如图:
20、再添加一调整层~渐变映射,如下图,便又得到了不同的效果:
加载全部内容